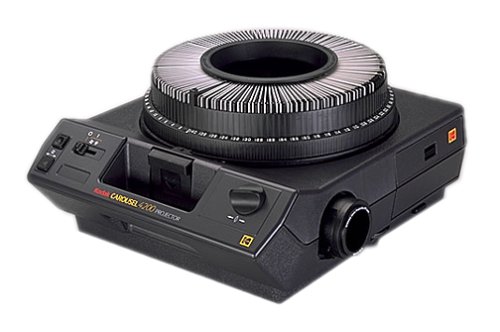
The old slides in our carousels are basically dead elephants unless we digitize them.
In the old days they offered the best quality to print from and gave us the opportunity to blow them up on a wall.
Today we can enjoy slide shows more easily on a computer or a large TV. How large a TV? Not really sure but when scanned, the more mega pixels will yield a bigger clearer picture and the actual slides have a lot of quality to offer for that.
In my experience the digitized slides scanned at 5 mega pixels seemed to show fine on a 32” TV.
I could have sent the slides to professionals to digitize, yet that process can be very expensive and in my uneducated view, it might not have been done as well as doing it myself.
I am saying not as good because no matter how careful a person is, film attracts dust and I am convinced that the digitized slides would have come back with at least one unacceptable dust spot.
Depending on your passion, scanning is really not too bad and relatively fast but the final ‘cleaning’ of dust spots off the digitized pictures is much more consuming.
It is a test of patience and nerves.
3,500 slides were scanned and dust spots removed. It took nearly six months of free time here and there but they turned out perfect. Watching TV and listening to the History Channel while working the slides helped time go by.
The overall as a level of complexity was a 3 on the scale of 10.
Suggestions:
Start with your favorites or most important.
‘Save as’ until you get comfortable in what you are doing.
Save the work done to an external drive.
Work from the easiest to fix to the hardest to build momentum.
Tools:
The film/slide scanner used was a VuPoint with 5 mega pixels quality images. It gave me no problems.
If you can get hold of a higher mega pixel scanner, it would be wonderful but at 5 mega pixels the slides produce humongous pictures.
Static master. Mine had expired years ago. They are sold at photography stores and their purchase is highly recommended to brush off dust. A fine bristle paint brush works also but not as well.
Air duster in a can. Costco had the better deals and I believe I used at least 6 cans in all.
Photoshop. My knowledge of this complex program was zero. Not to worry you will need to know about 5 commands or so total and one of them will use 99% of the time.
How I did it:
• The slides were loaded 3 at the time on the slide tray provided.
• They were brushed and air dusted.
• Scanned.
If you do not care about dust then you are done. Otherwise…
• Each slide was then opened in Photoshop.
• Learned to use the ‘navigator’ to get around the picture.
• Learned to use the ‘heal’ command with an appropriate size brush and used it 99% of the time.
The icon for ‘heal’ is a band aid. It is miraculous and almost unbelievable to the eyes!
It blends easily and can be used to also copy and paste.
• When done, I used ‘auto color’ and ‘auto contrast’ under the Image/Adjustments Tab.
• In the Image Tab I sometimes used ‘rotate’ to straighten the picture a couple of hairs.
• All the steps taken showed on the ‘history’ window on the side and undo was a click away.
If the shadows of some of your digitized pictures are bluish go to ‘mode’ in the Image
Tab. Notice RGB is checked. Check CMYK and save as.
Easily explained, RGB and CMYK have to do with colors. After comparing the same slides in RGB and CMYK, most of my slides have been saved in CMYK because they looked better.
Tips:
• The Alt on the keyboard is a very important key to get commands to work in Photoshop.
Your left hand will be on it most of the time.
• Slides in plastic mounts will have much less dust.
My slides were very important to me and I am extremely happy of the outcome.
The actual slides have been retired to plastic inserts and filed away in binders, while the digitized pictures can now be easily burned on CDs as slide shows with Microsoft Windows and then watched on the TV.