Problem:
A 6” hole in the exterior garage wall due to a clothes dryer vent that was relocated.
Solution:
Behind the stucco there was wood.
A 1x wood board large enough to cover the hole was glued and screwed to the existing 1x from the garage side.
This left a depth of about 1.5” to the edge of the stucco finish on the exterior.
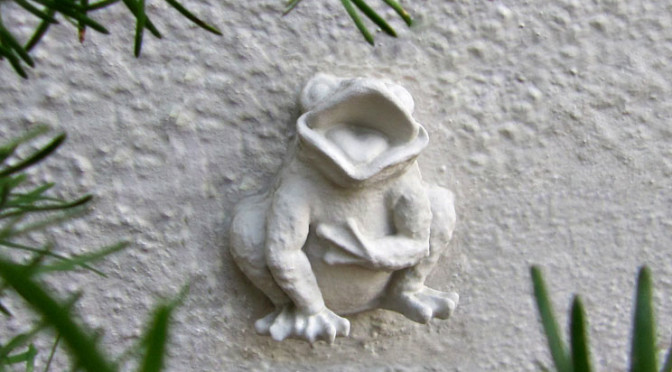
 A hollow garden toad this time proved handy. Part of the toad’s back was sawed off with a hack saw. Various tests occurred to see how the toad sat in the hole and then later with an anchor.
A coat hanger was doubled, bent to 90 degrees +- and cut making a 3”x3” +- anchor. A long sheet rock screw was inserted through the hole opening into the wood. This held the anchor.
Some concrete (cement is OK) was placed in the hole followed by a small piece of wire mesh.
More concrete was applied over the mesh as well as inside the toad.
The toad was pushed against the anchor sticking out of the wall and pushed into its seat.
It was an orchestration of movements but it all worked.
 The balance of the hole around the toad was filled, smoothed and a light texture applied. At this point a long board, held by a garbage can, was placed against the toad to insure it would not fall.
Later after the toad had cured, Concrete Fix All over the moistened concrete patch helped achieve a finished texture look.
Chinese bristle brushes or a spray water bottle work well to moisten.
The hooked toad was caulked and primed.
The job took about an hour and a half and at the time, the cost of the toad itself was about $3.00.